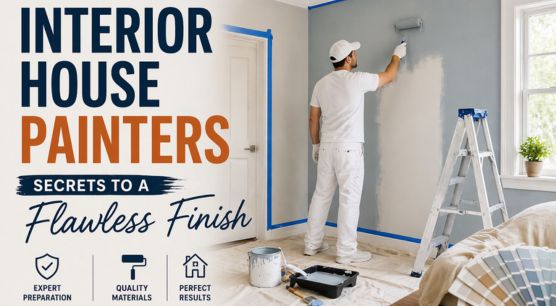
Ever noticed how some homes feel effortlessly polished, while others—despite good décor—fall just a little flat? More often than not, the difference lies in the quality of the paintwork. A flawless finish isn’t just about color choice; it’s about technique, preparation, and attention to detail. That’s where Interior House Painters truly make their mark.
Behind every smooth, streak-free wall is a mix of skill, patience, and a few industry secrets most homeowners never see. Let’s pull back the curtain and explore what really goes into achieving that picture-perfect finish.
The Foundation: Why Preparation Matters More Than Paint
If there’s one thing professionals agree on, it’s this—great painting starts long before the first brushstroke. In fact, preparation can take up to 60–70% of the entire job. According to the U.S. Environmental Protection Agency (EPA), proper surface preparation not only improves paint adhesion but also extends the lifespan of coatings.
Key Prep Steps Professionals Never Skip
- Surface Cleaning: Removing dust, grease, and stains ensures the paint bonds properly.
- Sanding & Smoothing: Eliminates imperfections and creates a uniform base.
- Priming: Especially important for new walls or drastic color changes.
- Crack & Hole Repair: Small flaws can ruin the final look if ignored.
Think of it like cooking—no matter how great your ingredients are, skipping preparation leads to a disappointing result.
Also Read: Top Beige Color That Will Give Your Home a Classic Look
Choosing the Right Paint: It’s Not Just About Color
Most homeowners focus heavily on color swatches, but professionals know the finish and quality of paint matter just as much. Matte, satin, and semi-gloss finishes all behave differently under light and wear.
How Experts Decide
- High-Traffic Areas: Satin or semi-gloss for durability
- Bedrooms & Ceilings: Matte for a soft, calming look
- Kitchens & Bathrooms: Moisture-resistant paints
Interestingly, research from Consumer Reports suggests that higher-quality paints often require fewer coats, saving both time and money in the long run.
The Technique Difference: Where Skill Shows
Here’s where things get interesting. Anyone can hold a brush—but not everyone can create a seamless finish. Professional painters use techniques that might look simple but require years of practice.
Pro Techniques for a Smooth Finish
- Cutting-In: Clean edges around corners and trims without tape
- Rolling in Sections: Prevents visible lines and uneven texture
- Maintaining a Wet Edge: Avoids lap marks
- Layering Coats Properly: Ensures depth and consistency
This is also why many homeowners prefer hiring experts instead of going DIY—it’s not just about effort, it’s about finesse.
Tools of the Trade: More Important Than You Think
A flawless finish often comes down to the tools used. Cheap brushes and rollers can leave streaks, lint, or uneven coverage. Professionals invest in high-quality equipment because it directly impacts the final result.
Interestingly, the same attention to detail applies when working with Outside House Painters, where weather resistance and durability become even more critical. Whether inside or out, the right tools make all the difference.
Timing & Environment: The Hidden Factors
Here’s something many people overlook—painting conditions matter. Temperature, humidity, and even airflow can affect how paint dries and adheres.
- Ideal Temperature: Typically between 15°C–25°C
- Low Humidity: Prevents slow drying and streaks
- Proper Ventilation: Ensures even curing
Ignoring these factors can lead to bubbling, cracking, or uneven finishes—issues that often require repainting.
Common Mistakes That Ruin the Finish
Even with the best intentions, small mistakes can undo hours of work. Professionals are trained to avoid these pitfalls.
- Skipping primer on new or repaired walls
- Using the wrong type of paint finish
- Applying thick coats instead of multiple thin layers
- Rushing drying time between coats
It’s a bit like rushing a good recipe—you might get something edible, but it won’t be exceptional.
FAQs
Q1. How long does it take to paint a room professionally?
Typically, a standard room can be completed within 1–2 days, depending on preparation and drying time between coats.
Q2. Is primer always necessary?
Not always, but it’s highly recommended for new walls, repairs, or drastic color changes to ensure a smooth and lasting finish.
Q3. What type of paint finish is best for interiors?
It depends on the room. Matte works well for low-traffic areas, while satin or semi-gloss is better for high-use spaces.
Q4. How often should interior walls be repainted?
Most homes benefit from repainting every 5–7 years, though high-traffic areas may need more frequent touch-ups.
Final Thoughts
A flawless paint finish isn’t magic—it’s the result of careful preparation, skilled technique, and a bit of patience. While DIY can be tempting, there’s a reason professionals consistently deliver better results. At the end of the day, great painting doesn’t just change walls—it transforms how a space feels.
Also Read: Interior House Painting Cost Per Room: Detailed Guide
Blog Development Credits:
This blog was thoughtfully conceptualized by Soumyajit Sardar, crafted with the help of advanced AI platforms like ChatGPT, Gemini, and Copilot. Final editing and SEO expertise were provided by Mister Paint.